Creating Instruments
This guide shows how to build instruments, from square-wave leads to timer-driven sounds. For the controls, see 9. Instrument Editor.
To start with a ready-made sound, choose Browse Standard Library (Ctrl+Alt+K) on the instrument list's toolbar. You can listen to RhYMe's instruments, add them to your song and adjust them (see Instrument Browser).
Lead
A lead carries the melody and needs a clear tone that cuts through the mix.
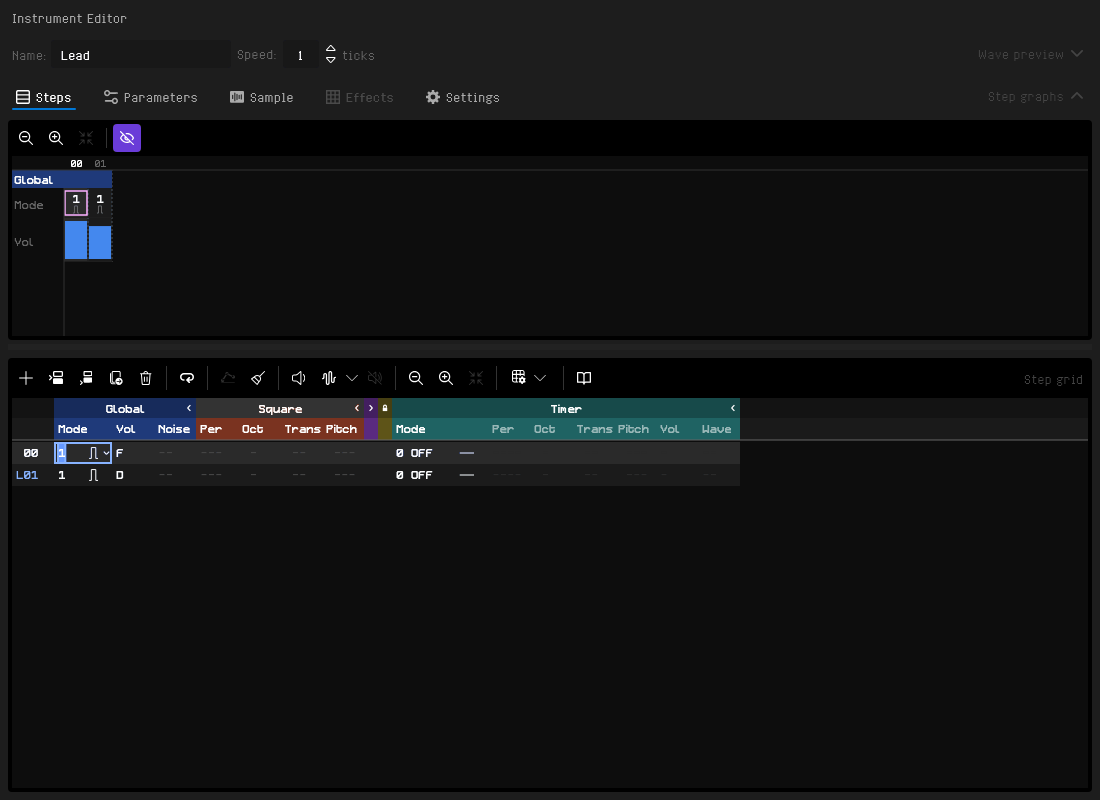
Start with Square Only mode (mode 1) on the first step and Vol at Fh (full). Keep the instrument Speed at its default of 1, as all the recipes here do.
Add a second step with a slightly lower volume, such as Dh, and set the loop start on it, so the note sustains at that level while it is held. For a percussive lead, drop the volume over 2–3 steps without a loop instead: a new instrument loops from its first step, so put the cursor on that step and press Ctrl+L to clear the loop.
Vibrato
For a vibrato on every note, set Vibrato on the instrument's Parameters tab. For one you start and stop in the pattern, use the H effect or a vibrato table (QVnn).
Arpeggio
Write A47 on the row of a lead note to cycle it through a major chord (the note, then 4 and 7 semitones up), without editing the instrument.
Hard Bass
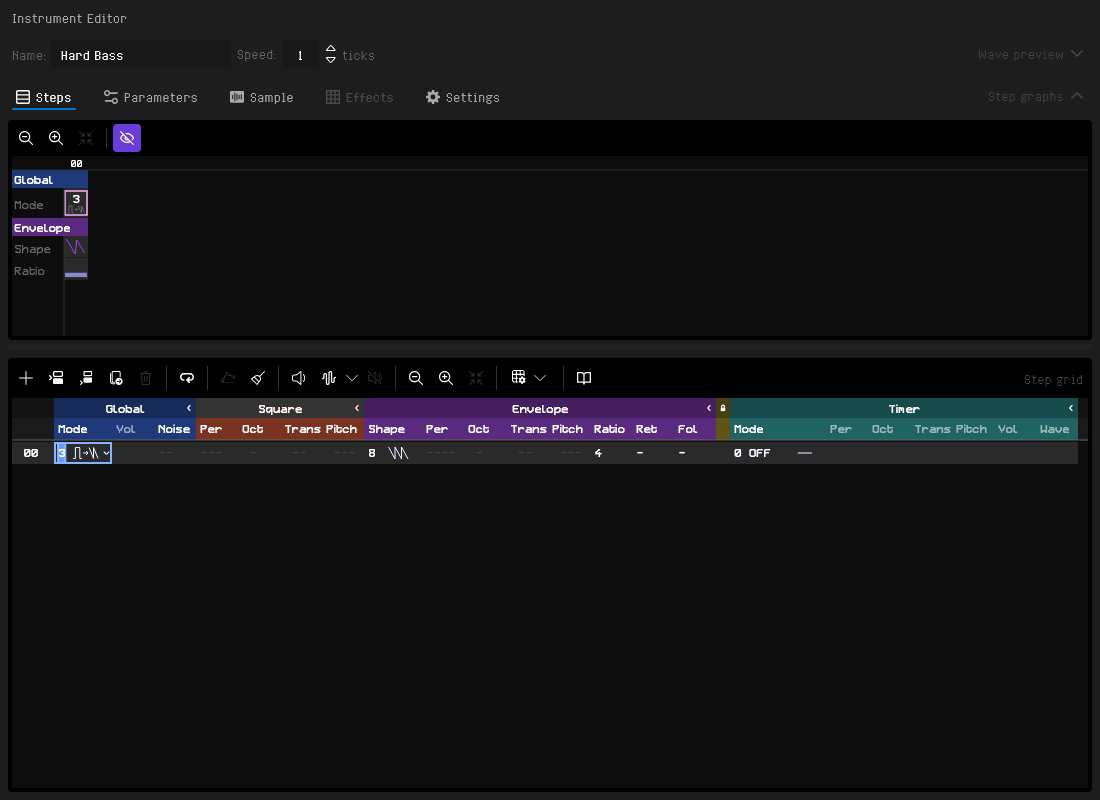
Hard bass uses Square Drives Envelope mode (mode 3) for the punchy bass typical of Atari ST chip music. Create an instrument with 1–2 steps in mode 3:
- Set the envelope Shape to one that repeats, such as
8h(falling saw),Ah(falling triangle),Ch(rising saw) orEh(rising triangle). A shape that runs once, such as9h, falls silent after a moment - Set the envelope Ratio to
2h–4h. Each step moves the envelope an octave: higher is brighter and buzzier, lower is deeper - Leave Vol at
Fh: in envelope modes the envelope sets the level - Leave the envelope Per unset, so the envelope ratio derives it from the square, unless you want a fixed envelope frequency
If some notes come out quieter than others, detune the square and the envelope a little, or drop the envelope an octave and let the square carry the fundamental. Higher up the keyboard a hard bass starts to sound flat; there, drop the envelope an octave or use the Envelope synchronization timer mode (see An In-Tune Buzzer and 8. Sound Generation).
Drums and Percussion
Drums on the YM2149 are built mostly from the noise generator, often with a short square-wave burst whose pitch drops quickly, as in the drums of the Standard Library.
A drum plays once, so it must not loop: on a new instrument, put the cursor on the first step and press Ctrl+L to clear the loop.
Make a drum Achromatic with Type on the Parameters tab. It then sounds the same whatever note you enter, its notes show as hits in the pattern, and transpositions leave them alone.
Kick Drum
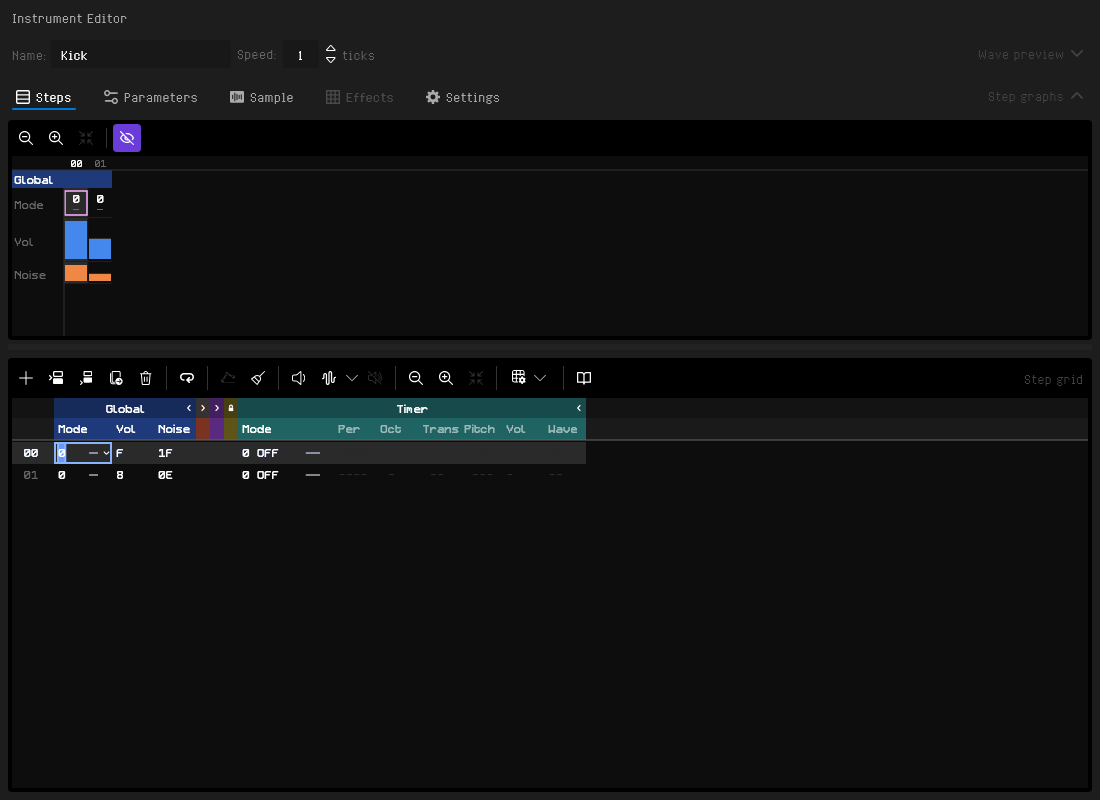
Use Off mode (mode 0) with a noise period set:
- Step 1: noise period
1Fh(lowest frequency), volumeFh, for a deep, rumbling attack - Step 2: noise period
0Ch–10h(mid frequency), volume8h
Add more steps for a longer kick.
Snare
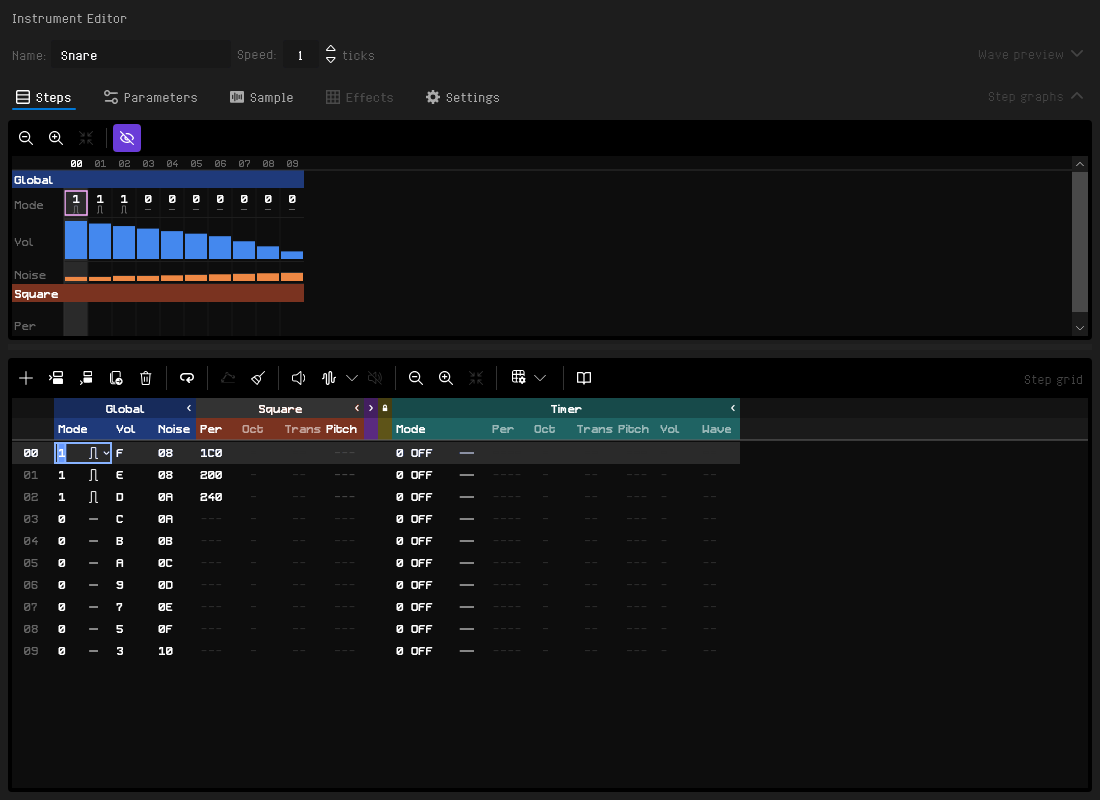
A snare combines a short square-wave burst, which gives the hit its body, with noise that rattles on after it. Lower the volume on every step so the hit fades:
- Steps 1–3: Square Only mode (mode 1), square Per
1C0h,200h, then240h, so the burst drops in pitch; noise period08h,08h, then0Ah; volumeFh,Eh, thenDh - Steps 4–10: Off mode (mode 0), noise only, its period rising from
0Ahto10hso the rattle darkens as it fades; volume falling fromChto3h
Writing the square Per keeps the burst at the same pitch whatever note you enter. For a snare with the envelope's buzz in its body, use Square and Envelope mode (mode 5) with envelope shape 8h on the first steps instead. In that mode the envelope sets the level, so the steps' volumes do not make it fade, and it takes the envelope from any other channel using it. For a simpler snare, use Off mode with only noise at 04h–08h.
Hi-hat
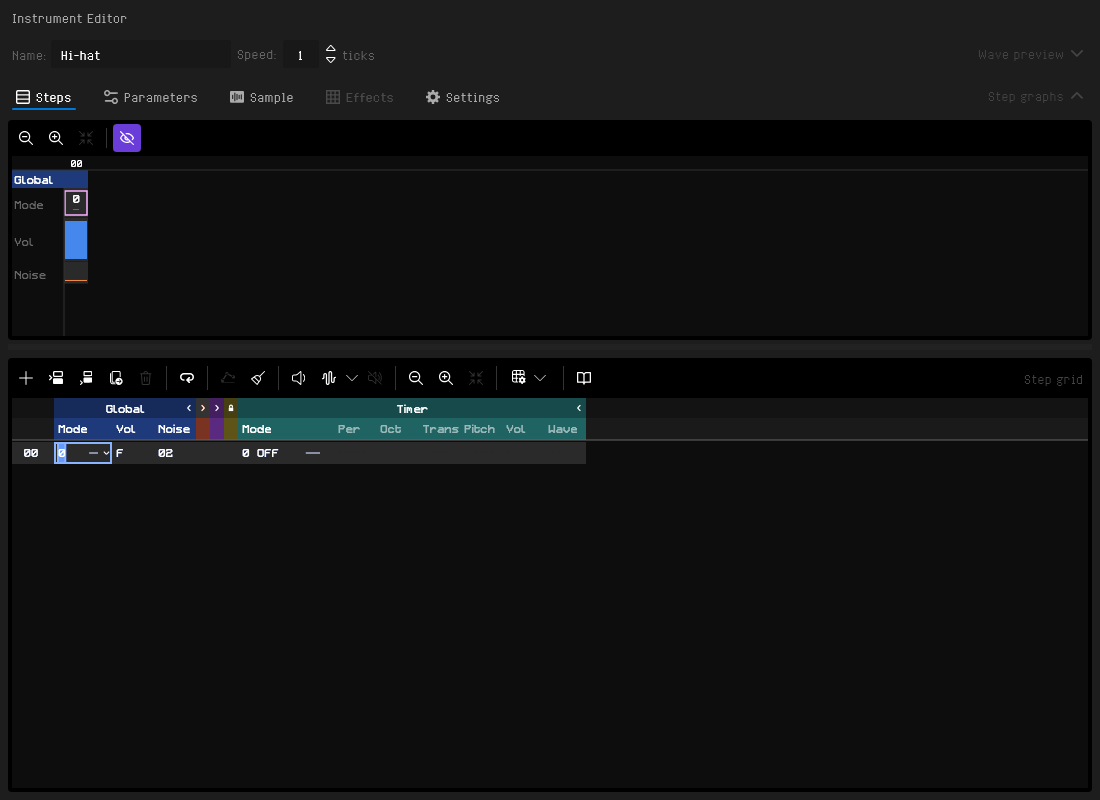
Use Off mode with a single noise burst at a high frequency (01h–03h), volume Fh.
Noise and Shared Resources
The three channels share one noise generator, so let only one channel play noise at a time, or give channels that play it together the same noise period (see Shared Hardware Resources).
PWM Textures
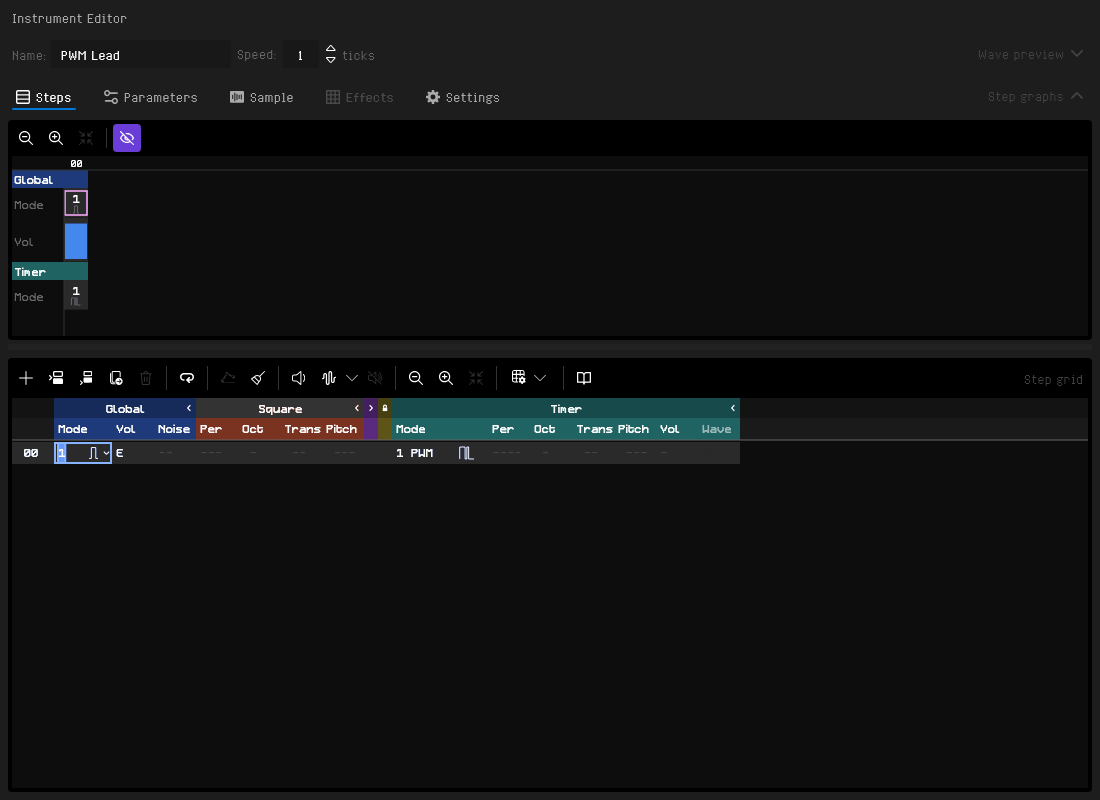
Pulse-width modulation (timer mode 1) makes a square-wave tone richer by switching its volume at audio rate.
- Set the tone mode to Square Only (mode 1) and the timer Mode to
1(PWM) - The PWM rate follows the square: slower on lower notes, faster on higher ones
- Use the timer Oct and Trans columns to shift the PWM rate without changing the pitch
PWM and Vibrato
Add a vibrato (H or a vibrato table) to a PWM lead for a thick, analog-like sound.
An In-Tune Buzzer
A buzzer pitched by the envelope period alone drifts off the note above the bass (see Envelope Tuning). The Envelope synchronization timer mode (ESY, timer mode 2) puts it in tune: the timer restarts the envelope at the note's pitch, and the envelope's own period only shapes the sound.
- Set the tone mode to Envelope Only (mode 2) and the envelope Shape to
8h(falling saw) - Set the envelope Oct to
+4, which puts a plain buzzer on its note - Set the timer Mode to
2(ESY) and the timer Oct to-1, so the timer restarts the envelope once per cycle of the note - Keep the loop a new instrument starts with
Vol has no effect here; the next section gives a buzzer a volume. The buzzer uses one of the song's timers and the envelope generator. The Hardbass Tuned instruments of the Standard Library are built this way.
A Buzzer with a Volume
The Envelope Volume Modulation timer mode (EVM, timer mode 3) gives a buzzer a working Vol: the timer restarts a rising envelope at the buzzer's pitch, and the step volume sets how far the ramp climbs.
- Set the tone mode to Envelope Only (mode 2)
- Tune the buzzer with the envelope Oct and Trans columns; Oct
+4puts it on the note - Set the timer Mode to
3(EVM). The envelope shape is set to the rising ramp for you, and in its list the other shapes are unavailable. The other columns RhYMe sets itself are dimmed - Set Vol as for a square:
0is silence and each level matches a square's up toE;EandFboth play the full ramp, a little quieter than a square atF - Lower Vol over the following steps, or use a volume slide in the pattern, for a decay
The buzzer is in tune across the whole keyboard. It uses one of the song's timers, and only one such buzzer can play at a time. See Sound Generation for its limits.
Wavetable
A wavetable plays a waveform you draw, one cycle of up to 64 volume levels, at the note's pitch (see 13. Wavetables). Wavetables are available in Expert mode while the song's Wavetables feature is checked.
- On the Wavetables tab, click Add Wavetable; a new wavetable is one cycle of a sine at 12 levels
- In the instrument, set the step's tone mode to Off (mode 0), so the wavetable plays on its own, and keep Vol at
Fh - Set the timer Mode to
4(WVT) and type the wavetable's number,01, into the Wave column - Keep the loop a new instrument starts with: without it, a single step ends the note after one tick
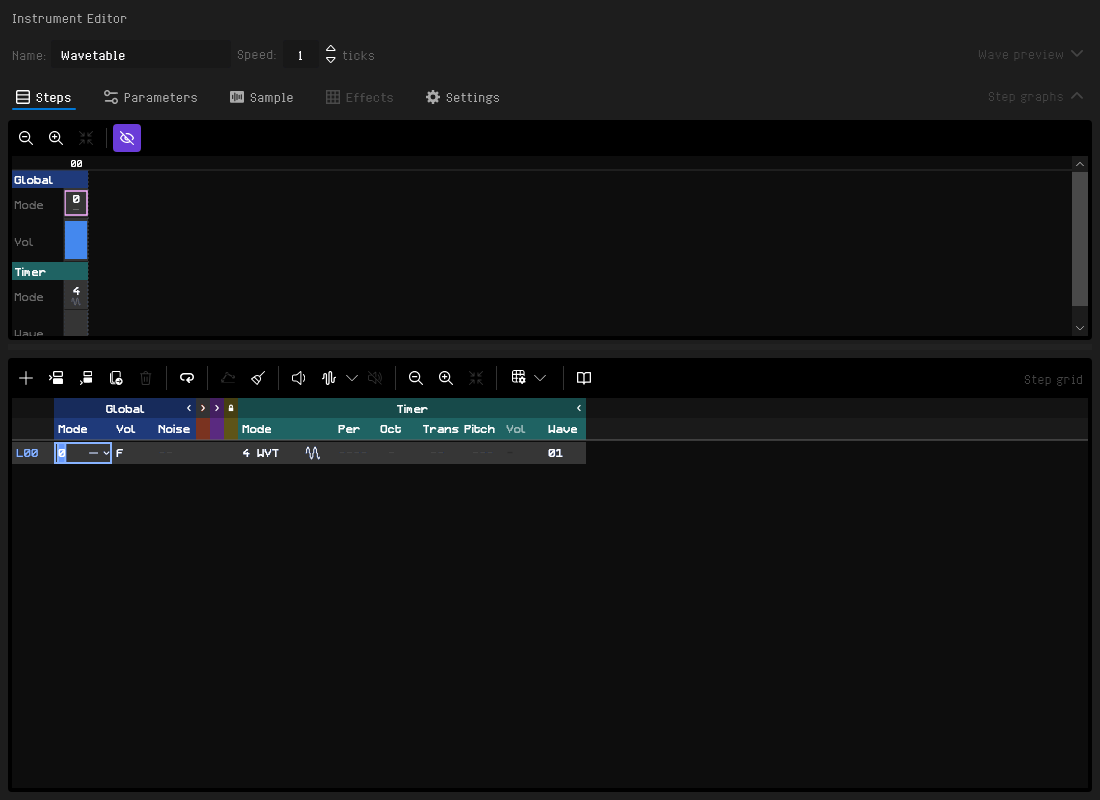
With Square Only instead of Off, the wavetable shapes the square. The wavetable uses one of the song's timers; see Playing a Wavetable.
Hybrid: a Sample over a Square
An instrument can play a sample with every note while its steps go on, so a recorded hit can open a note that the square then continues. Add a sample on the Samples tab first; samples are available in Expert mode while the song's Samples feature is checked.
- On the instrument's Sample tab, choose the sample under Source. On a new instrument this leaves a single step with tone mode Off and no loop, so only the sample is heard
- Append two steps in Square Only mode (mode 1) with
Ctrl+Ins, at volumesChandAh - Set the loop start on the second step (
01) withCtrl+L, so the square keeps sounding while the note is held
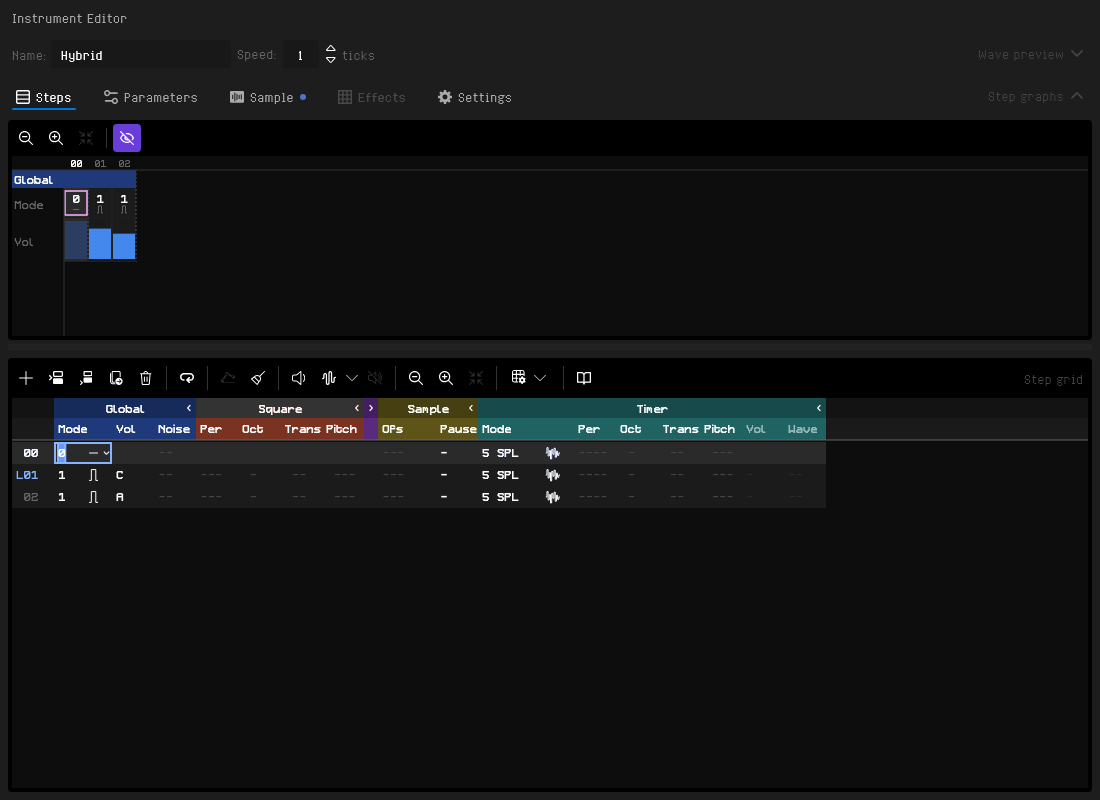
The sample starts on its own, then the square sounds under it, shaped by the sample while it plays. The sample uses one of the song's timers; see Sample Tab for following the pitch and the volume.
General Tips
Preview often. Preview Step (Shift+/) plays the step you are building; Preview Instrument plays the whole instrument with its loop.
Use looping for sustains. An instrument that should sound for as long as the note is held needs a loop; set the loop start with Ctrl+L on the step to return to.
Watch for shared resources. See Shared Hardware Resources.
Color-code your instruments. Give instruments distinct colors under Appearance on the Settings tab to see in the pattern grid which instrument plays where.
Reuse with variation. Duplicate an instrument (Ctrl+D in the instrument list) and change a few steps: a lead with vibrato and one without, a bass with a harder attack.